8-Day Australia City-Hopping Itinerary
Arrival and highlights in Sydney
- Sydney Airport to Circular Quay — Sydney CBD; travel by train or taxi after arrival, allowing ~30–45 minutes plus luggage drop.
- The Rocks — The Rocks; explore historic lanes and harbor viewpoints, early afternoon, ~1.5 hours.
- Sydney Opera House — Bennelong Point; take a guided interior tour or admire the exterior, mid-afternoon, ~1 hour.
- Royal Botanic Garden Sydney — Sydney CBD; stroll toward Mrs Macquarie’s Point for superb harbor views, late afternoon, ~1.5 hours.
- The Glenmore — The Rocks; enjoy a casual rooftop meal with Opera House views, evening, ~1.5 hours, approximately A$35–60 per person.
Arrival & Transfer to the Harbour
After landing at Sydney Airport, follow signs for the train to Circular Quay—the Airport Link takes roughly 20–25 minutes to the city, though allow 30–45 minutes with luggage and any wait time. Airport station fees make the fare noticeably higher than a normal Sydney trip; contactless payment or an Opal card works. A taxi or rideshare is simpler with heavy bags, usually 20–30 minutes outside peak traffic. Drop luggage at your accommodation or a Circular Quay locker before beginning the sightseeing loop.
Afternoon: The Rocks & Sydney Opera House
Start in The Rocks, allowing about 1½ hours to wander its sandstone lanes, small galleries, and harbor viewpoints around Campbell’s Cove. The area is especially pleasant in the early afternoon, before the waterfront becomes busy; the weekend markets are not normally operating on a Tuesday, so focus on the historic streets and lookouts rather than expecting market stalls. From there, walk along the waterfront to the Sydney Opera House—about 10–15 minutes. Spend an hour admiring the exterior from the forecourt or join an interior guided tour if timings suit; tours generally run during the day and cost approximately A$45–55, with advance booking worthwhile. Keep the confirmation handy, as tour availability can change with performances and rehearsals.
Late Afternoon & Evening
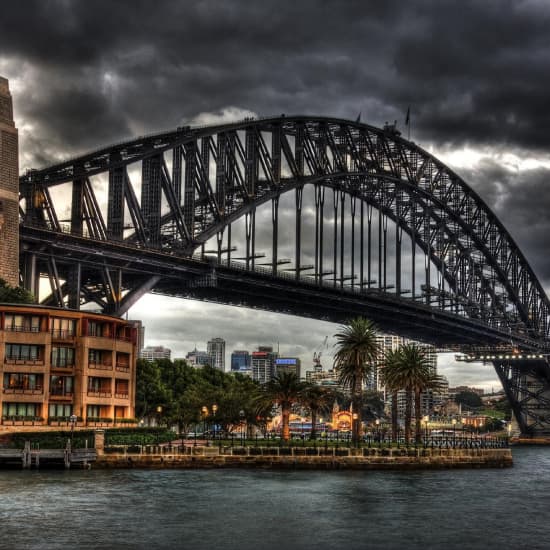
Continue into the Royal Botanic Garden Sydney and follow the paths toward Mrs Macquarie’s Point, one of the city’s best places for an unobstructed view of the Sydney Opera House and Sydney Harbour Bridge. Allow around 1½ hours at an easy pace, stopping for photographs and enjoying the harbor light; the gardens are free and typically open from early morning until evening, but leave before the gates close around sunset. Finish back in The Rocks at The Glenmore, whose rooftop is a relaxed choice for dinner with Opera House views. Allow A$35–60 per person for a casual meal and drink, and arrive before the busiest dinner period if you want a rooftop table—seating is generally first come, first served, and wet weather can affect availability.
Sydney Harbour and eastern beaches
- Mrs Macquarie’s Point — Royal Botanic Garden; start with sunrise views across the Harbour Bridge and Opera House, morning, ~45 minutes.
- Sydney Harbour Bridge Pylon Lookout — The Rocks; climb for elevated harbor panoramas, morning, ~1.5 hours.
- Circular Quay to Watsons Bay ferry — Sydney Harbour; scenic ferry ride along the harbor, late morning, ~30 minutes.
- The Gap — Watsons Bay; walk the clifftop lookout above the Pacific Ocean, midday, ~45 minutes.
- Bondi to Coogee Coastal Walk — Bondi; complete the scenic section toward Tamarama and Bronte, afternoon, ~2.5 hours.
- Icebergs Dining Room and Bar — Bondi Beach; dine overlooking the beach, evening, ~1.5 hours, approximately A$45–80 per person.
Morning
Begin at Mrs Macquarie’s Point in the Royal Botanic Garden for sunrise over Sydney Harbour Bridge and the Sydney Opera House. Arrive around 6:30–7:00 AM; the gardens generally open before sunrise, and this is one of the city’s best quiet viewpoints before tour groups arrive. Allow about 45 minutes, then walk north through the gardens toward The Rocks—roughly 25–30 minutes—or take a short taxi if you prefer to save your legs.
Continue to Sydney Harbour Bridge Pylon Lookout, entered from Cumberland Street. The climb is more than 200 stairs and takes around 1–1.5 hours including the museum exhibits and viewing platform; check the day’s opening time before setting out, as it commonly opens from 10:00 AM and hours can vary. Tickets are usually around A$25–30. Afterward, walk down to Circular Quay for the ferry to Watsons Bay. The ride takes about 30 minutes and is best enjoyed outside; use an Opal card or contactless payment, and check the live timetable because weekend and weekday frequencies differ.
Afternoon and Evening
From Watsons Bay Wharf, walk toward The Gap, following the signs along Military Road and the clifftop paths. Allow about 45 minutes for the lookouts and return to the village; stay behind the barriers, as the cliffs are exposed and windy. Continue by bus to Bondi Beach—route 380 is usually the simplest option, taking roughly 25–35 minutes depending on traffic. Start the Bondi to Coogee Coastal Walk from the southern end of the beach and complete the particularly rewarding section toward Tamarama and Bronte. Allow about 2.5 hours with photo stops; the path includes stairs and uneven sections, so wear proper shoes and carry water. You can finish at Bronte and take a bus back toward Bondi rather than walking the full route.
For dinner, settle into Icebergs Dining Room and Bar above Bondi Beach, where the large windows make the sunset and evening surf part of the experience. A main meal generally costs around A$45–80 per person, with drinks extra; booking is strongly recommended, especially for a table in the dining room. If you have time before your reservation, check the surf from the promenade, but keep the evening relaxed after the coastal walk.
Blue Mountains escape from Sydney
- Sydney to Katoomba by Blue Mountains Line — Sydney to Katoomba; depart around 7:00 AM, allowing ~2 hours, and use local buses or taxis on arrival.
- Echo Point Lookout — Katoomba; see the Three Sisters and Jamison Valley, morning, ~45 minutes.
- Prince Henry Cliff Walk — Katoomba; enjoy a forested clifftop section toward Leura, late morning, ~1.5 hours.
- Leura Mall — Leura; browse the village shops and stop for lunch at a well-reviewed café, midday, ~1.5 hours, approximately A$20–35 per person.
- Scenic World — Katoomba; ride the Scenic Railway, Cableway, or Skyway for dramatic valley views, afternoon, ~2.5 hours.
- Katoomba to Sydney by Blue Mountains Line — Katoomba to Sydney; depart around 5:00 PM, allowing ~2 hours, with a station-area dinner if needed.
Morning
Take the Blue Mountains Line from Central Station around 7:00 AM; the journey to Katoomba takes roughly two hours. Tap on and off with an Opal card or contactless bank card, and bring a light jacket—Katoomba is often noticeably cooler than Sydney in September. From the station, use a local bus or taxi to Echo Point Lookout. Allow about 45 minutes for the Three Sisters and Jamison Valley viewpoints; arrive early for clearer views and fewer tour groups. The lookout is free, with public toilets and cafés nearby.
From Echo Point, walk the signed section of the Prince Henry Cliff Walk toward Leura, allowing around 1½ hours. This is a much nicer way to experience the mountains than simply moving between lookouts: expect eucalyptus forest, sandstone cliffs, and occasional valley views. Wear proper walking shoes and carry water, as some sections are uneven. Check National Parks alerts before leaving, since weather or trackwork can occasionally close sections.
Lunch & Afternoon
Continue into Leura and spend about 1½ hours along Leura Mall, browsing its independent bookshops, galleries, gift stores, and old-fashioned sweet shops. For lunch, try Bakehouse on Wentworth for generous café meals and excellent baked goods, or Polar Bear of Leura for a relaxed brunch-style stop; budget around A$20–35 per person. Buses run between Leura and Katoomba, though a short taxi ride is easier if you are carrying shopping or running late. Most shops keep daytime hours, but smaller businesses may close around 3:00–4:00 PM.
Return to Katoomba for approximately 2½ hours at Scenic World. The Scenic Railway, Scenic Cableway, and Scenic Skyway each offer a different perspective over the valley, and a combined pass is usually the simplest choice, commonly around A$55–65 for an adult. Check the official operating schedule before setting out, as rides can pause during strong winds or maintenance. Afterward, head back to Katoomba Station and take an evening Blue Mountains Line train toward Sydney around 5:00 PM; allow about two hours and pick up dinner near the station or on arrival in the city.
Melbourne city discovery
- Melbourne Airport to Southern Cross Station — Melbourne CBD; take the SkyBus or taxi after arrival, allowing ~30–45 minutes plus hotel check-in.
- Federation Square — Melbourne CBD; orient yourself beside the Yarra and visit the visitor centre, late morning, ~45 minutes.
- Hosier Lane — Melbourne CBD; see one of the city’s most famous rotating street-art corridors, late morning, ~30 minutes.
- Queen Victoria Market — North Melbourne; browse produce, specialty stalls, and casual lunch options, midday, ~2 hours, approximately A$20–35 per person.
- Melbourne Museum — Carlton; explore natural-history and First Peoples exhibitions, afternoon, ~2.5 hours.
- Tipo 00 — Melbourne CBD; enjoy refined Italian food in a compact laneway setting, evening, ~1.5 hours, approximately A$60–100 per person.
Late Morning
Once you reach Southern Cross Station, leave your bags at the hotel if the room is not ready—Melbourne’s CBD is easy to explore on foot, and dragging luggage through the laneways is frustrating. Walk about 10 minutes east along Flinders Street to Federation Square, arriving around 11:00 AM. Stop into the visitor centre for current exhibition, transport, and dining information, then take a few minutes beside the Yarra River; the square is a useful orientation point rather than somewhere to linger for hours. From there, it is a two-minute walk to Hosier Lane, where the murals change constantly. Spend roughly 30 minutes exploring the adjoining AC/DC Lane, but keep valuables secure in the busy central section.
Lunch & Afternoon
From Hosier Lane, walk about 20 minutes north through the CBD to Queen Victoria Market—or take a short tram ride, checking the free CBD tram-zone boundaries before tapping on. Allow around two hours for the produce halls, delicatessen counters, and specialty stalls, with approximately A$20–35 per person for a relaxed lunch. Market trading days and hours vary, so verify the schedule before setting out; the market is usually liveliest around midday, while some fresh-food stalls begin packing up later in the afternoon. After lunch, take tram 30 or 35 from the CBD, or walk around 20 minutes, to Melbourne Museum in Carlton Gardens. Give yourself about 2½ hours for the natural-history galleries and the Bunjilaka Aboriginal Cultural Centre, which provides important context on the history and living cultures of Victoria’s First Peoples. Allow roughly A$15–20 for an adult general-admission ticket, and check the museum’s current closing time before visiting.
Evening
Return to the CBD by tram or on foot, leaving a little breathing room to wander around Little Bourke Street and the nearby laneways before dinner. Reserve Tipo 00 well ahead—its intimate dining room on Little Bourke Street fills quickly, particularly on Friday and Saturday evenings. Expect about A$60–100 per person before drinks for handmade pasta and refined Italian dishes; a 1½-hour booking works well after the museum. Melbourne evenings in September can be cool, so bring a light jacket, and remember that the CBD’s free tram zone covers much of the return journey if you prefer not to walk.
Melbourne laneways and cultural districts
- Royal Exhibition Building — Carlton; admire the grand nineteenth-century architecture and surrounding Carlton Gardens, morning, ~1 hour.
- Carlton Gardens — Carlton; take a relaxed garden walk before the city gets busy, morning, ~45 minutes.
- State Library Victoria — Melbourne CBD; see the La Trobe Reading Room and historic collections, late morning, ~1.5 hours.
- Block Arcade — Melbourne CBD; browse the ornate heritage arcade and its small specialty shops, midday, ~45 minutes.
- ACMI — Federation Square; explore interactive exhibitions about film, television, and digital culture, afternoon, ~2 hours.
- Chin Chin — Melbourne CBD; have lively modern Thai food for dinner, evening, ~1.5 hours, approximately A$40–70 per person.
Morning
Start in Carlton at the Royal Exhibition Building, one of Melbourne’s finest nineteenth-century landmarks. It opens for tours and exhibitions on selected days rather than as a continuously accessible museum, so check the official schedule before setting out; even when the interior is closed, the exterior is worth seeing. Allow about an hour, then continue directly into Carlton Gardens for an easy 45-minute stroll around the lawns, fountains, and mature plantings. The gardens are free and generally accessible from early morning. From here, walk south along Nicholson Street toward the CBD—roughly 20 minutes—or take a short tram ride if you prefer to save your legs.
Late morning, spend around 90 minutes at the State Library Victoria on Swanston Street. Entry is free, and the spectacular La Trobe Reading Room is the highlight; galleries typically open from 10:00 AM, but confirm hours for the date of your visit. Afterward, wander a few minutes through the CBD to the Block Arcade, entering from Collins Street or Elizabeth Street. Its mosaic floors, glass roof, and small specialty shops make it ideal for an unhurried midday browse. For coffee or a light pastry here, The Tea Room is the classic choice, though prices reflect the setting.
Afternoon & Evening
Continue to ACMI at Federation Square, about a 10-minute walk from the Block Arcade via Collins Street and Flinders Lane. Plan roughly two hours for its interactive screen-culture exhibitions; general entry is usually free, while major temporary exhibitions may cost around A$10–25. Afterward, take a relaxed break around the square or along the nearby Yarra River before dinner. For the evening, head to Chin Chin on Flinders Lane, where lively modern Thai cooking and a busy atmosphere are part of the experience. Expect approximately A$40–70 per person before drinks; reservations are useful, but walk-ins can sometimes be fitted in at the bar. Melbourne’s CBD sights are close enough to cover on foot, and trams within the Free Tram Zone are free—just check the zone boundaries before tapping on.
Great Ocean Road gateway
- Melbourne to Torquay by car or coach — Melbourne to Torquay; depart around 7:00 AM, allowing ~1.5–2 hours; pre-book parking or confirm coach drop-off near the foreshore.
- Torquay Surf Beach — Torquay; watch surfers and begin the Great Ocean Road atmosphere at the coast, morning, ~45 minutes.
- Australian National Surfing Museum — Torquay; learn about Australia’s surf history and culture, late morning, ~1 hour.
- Bells Beach — Jan Juc; visit one of Victoria’s iconic surf breaks and coastal lookouts, midday, ~45 minutes.
- Anglesea Riverbank — Anglesea; enjoy a relaxed riverside walk and lunch at a well-reviewed local café, afternoon, ~1.5 hours, approximately A$20–35 per person.
- Torquay to Melbourne — Torquay to Melbourne; depart around 4:00 PM, allowing ~1.5–2 hours, returning via the M1.
Morning
Collect your rental car in Melbourne around 7:00 AM and take the M1 toward Geelong, then the Princes Freeway to Torquay—allow about 1.5–2 hours, with a short coffee stop if needed. Arriving early makes parking near Torquay Surf Beach much easier; use the foreshore car parks around The Esplanade, and check signs carefully for time limits. Spend roughly 45 minutes watching the morning surf and walking the beach—September can be brisk and windy, so bring a warm layer. From there, it is a short drive into town for the Australian National Surfing Museum, usually open from around 9:30 AM to 4:30 PM; allow an hour and budget approximately A$10–15 for admission. It is a compact, worthwhile stop covering surfboards, local surf culture, and Australia’s competition history.
Late Morning & Afternoon
Drive about 10 minutes west toward Jan Juc and follow signs to Bells Beach. The lookout and cliff-top paths offer the best perspective, but stay behind barriers and keep clear of the exposed edges—the swell can be powerful even on calm-looking days. After about 45 minutes, continue roughly 15 minutes along the coast to Anglesea. Park near the town centre or river precinct, then take a relaxed walk beside the Anglesea River before lunch. For a casual meal, try Diggers Vegie Kitchen on the Great Ocean Road, or The Captain of Aireys if you prefer a more substantial café-style stop; allow A$20–35 per person and check Sunday opening hours, as smaller coastal businesses sometimes close early. Keep the afternoon unhurried rather than adding more viewpoints—the river walk and village atmosphere are a pleasant contrast to the surf beaches.
Return to Melbourne
Leave Torquay around 4:00 PM for the return via the Princes Freeway and M1, allowing 1.5–2 hours depending on traffic. Refuel before leaving town, particularly if returning the car at the airport, and allow extra time for Melbourne’s evening congestion around Werribee and the western suburbs. If you have a little daylight and traffic is moving well, a brief coffee or takeaway stop in Geelong is an easy break without taking you far off route.
Brisbane riverside and city centre
- South Bank Parklands — South Bank; walk the riverside paths and Streets Beach precinct, morning, ~1.5 hours.
- Queensland Art Gallery and Gallery of Modern Art (QAGOMA) — South Bank; explore major Australian and international collections, late morning, ~2.5 hours.
- Brisbane City Botanic Gardens — Brisbane CBD; stroll beside the river through subtropical plantings, afternoon, ~1 hour.
- Brisbane City Hall — Brisbane CBD; admire the landmark building and visit the Museum of Brisbane, afternoon, ~1.5 hours.
- Howard Smith Wharves — Fortitude Valley; relax beneath the Story Bridge with river views, early evening, ~1.5 hours.
- Eat Street Northshore — Hamilton; sample food from varied vendors in a lively evening market setting, evening, ~2 hours, approximately A$25–45 per person.
Morning
After your morning arrival in Brisbane, head straight to South Bank Parklands and allow about 1½ hours to settle into the city. Walk the riverside paths toward the Streets Beach precinct, Brisbane’s much-loved man-made lagoon—free to use and generally open from early morning, although swimming facilities and lifeguard hours can vary. The shaded paths and subtropical planting make this a pleasant first stroll; if you need coffee, The Gunshop Café on nearby Mollison Street is a good local-style stop, though allow extra time if you sit down.
Continue on foot through South Bank to the Queensland Art Gallery and Gallery of Modern Art (QAGOMA), usually less than 15 minutes away. Plan around 2½ hours across the two buildings, focusing on the Australian collection and whichever temporary exhibition appeals to you; general admission is free, while major exhibitions may charge roughly A$10–35. Galleries typically open at 10:00 AM, so use the first part of the morning for South Bank if you arrive before opening. The complex is large, and the riverside café is convenient, but South Bank has better casual lunch choices along Grey Street if you prefer to eat outside the museum.
Afternoon
After lunch, cross the Goodwill Bridge or take the short walk north toward the Brisbane City Botanic Gardens—around 20–25 minutes from QAGOMA. Spend an easy hour among the palms, banyans, and riverfront lawns rather than trying to cover every path. Entry is free, and the gardens are generally open during daylight hours; keep a little water with you, as Brisbane’s spring sun can feel strong even when temperatures are mild. From the gardens, walk uphill through the CBD to Brisbane City Hall, roughly 15 minutes. Join a free guided building tour if one is running, then visit the Museum of Brisbane inside; museum admission is free, but check the day’s tour and exhibition times before relying on them.
Evening
In the late afternoon, take a short bus or rideshare north to Howard Smith Wharves—allow about 10–15 minutes from City Hall depending on traffic—or walk via Ann Street in roughly 25 minutes. Settle beneath the Story Bridge for a drink and river views; the precinct’s restaurants and bars are more polished than cheap, so it is worth booking if you want a proper table. Later, continue by rideshare or bus to Eat Street Northshore in Hamilton, usually 15–20 minutes away. This lively open-air night market normally operates from Friday to Sunday evenings, commonly from around 4:00 PM until 10:00 PM, with an entry fee often around A$6–10 and food costing approximately A$25–45 per person. Check the current operating night before setting out—if it is not running on this Sunday, keep dinner at Howard Smith Wharves rather than making the trip.
Gold Coast departure
- Brisbane to Surfers Paradise by train and tram — Brisbane to Surfers Paradise; depart around 7:00 AM, allowing ~1.5–2 hours, and leave luggage at your hotel or a luggage facility.
- Surfers Paradise Beach — Surfers Paradise; take an easy morning beach walk before the crowds build, morning, ~1 hour.
- SkyPoint Observation Deck — Surfers Paradise; enjoy sweeping views of the Gold Coast coastline, late morning, ~1 hour.
- HOTA Gallery — Bundall; explore contemporary Australian art and the surrounding cultural precinct, midday, ~2 hours.
- Miami Marketta — Miami; have an early casual meal from rotating food vendors before departure, afternoon, ~1.5 hours, approximately A$20–40 per person.
- Surfers Paradise to Gold Coast Airport — Gold Coast; depart around 3–4 hours before the flight by tram and airport transfer or taxi, allowing ~45–60 minutes plus check-in.
Morning
Take the Translink train from Brisbane to Helensvale, then change to the G:link tram for Surfers Paradise; allow roughly 1½–2 hours and aim to leave around 7:00 AM. Tap on and off with a go card or contactless bank card, and check the Translink app before leaving for weekend engineering works. Drop your bags at your hotel or a luggage facility near Cavill Avenue, then walk down to Surfers Paradise Beach for an easy shoreline stroll. The beach is free and open all day; stay between the red-and-yellow flags if you decide to swim, as conditions can change quickly.
Late Morning & Midday
Head to SkyPoint Observation Deck inside Q1—about a five-minute walk from the beach—for wide views north toward Southport and south along the coastline. Allow about an hour; admission is generally around A$35–45 for adults, with the first lift rides usually from mid-morning, so confirm the opening time when booking. From there, take the G:link south to Broadbeach South and transfer by bus or taxi to HOTA Gallery in Bundall; the full trip is roughly 20–30 minutes. The gallery usually opens from late morning and has free general entry, although major exhibitions may charge separately. Spend around two hours inside, then leave a little time for the outdoor cultural precinct and the lakeside paths.
Afternoon & Departure
Make your way by tram or taxi to Miami Marketta, allowing around 15–25 minutes depending on traffic. It is a relaxed place for an early meal from rotating food vendors—budget approximately A$20–40 per person—and it is wise to check the current program and trading hours, since the market’s busiest food-night format is often concentrated later in the week. After eating, collect your luggage and leave Surfers Paradise around three hours before your flight; take the G:link toward Broadbeach South, connect with the airport bus or a pre-booked taxi, and allow 45–60 minutes for the transfer plus airport check-in. A taxi or rideshare is simpler with bags, particularly if your flight is during the afternoon school-holiday rush.